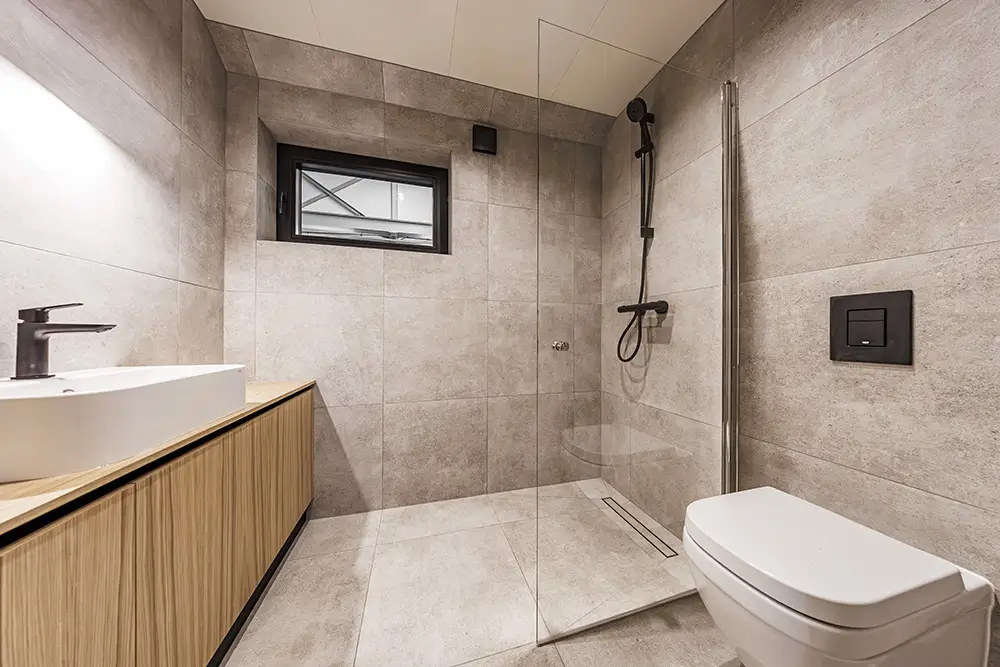
The showers that fail in two years almost never fail at the tile. They fail underneath it, at the pan and the waterproofing, the parts you stop being able to see the day the tile goes on. A curbless shower raises the stakes, because there is no curb holding the water in. We build a lot of these in Covington, and we also get called in to tear out other people’s when they go wrong, so here is exactly how we waterproof a curbless walk-in shower so it lasts.
A curbless walk-in is the most common version of the tub-to-shower conversion we do, and it is also the one that punishes shortcuts the hardest.
What “curbless” changes about waterproofing
A normal shower has a curb, the little wall at the threshold that keeps water inside the shower. A curbless shower does not. The floor runs flat out of the shower and into the bathroom, which is the whole appeal: nothing to step over, one open space to clean, easy to roll a walker or wheelchair into. It also means nothing physically stops water from leaving the shower. So the whole assembly has to be built to move every drop to the drain and to keep water off the framing even where the shower opens into the room. That is a higher bar than a standard shower, and it is why a curbless one is the worst place to cut a corner.
It starts with the framing, before any waterproofing goes in
Most Covington homes are wood-framed, and for a curbless shower on a wood floor, the shower area has to sit lower than the rest of the bathroom so the sloped floor finishes flush at the doorway. We do that by recessing the subfloor inside the shower footprint, which usually means notching or sistering the floor joists, or by building up the rest of the bathroom floor to meet it. Either way it gets worked out on paper first, not guessed on site.
We also make sure the floor is stiff enough. Tile wants very little movement under it. The standard we build to is a floor that flexes no more than its span over 360 for ceramic tile, and over 720 for natural stone. A bouncy floor cracks grout and tile and works the waterproofing seams loose over time, so if the joists need reinforcing, that happens before anything else. None of this shows in the finished shower. All of it decides whether the finished shower lasts.
The slope and the drain
Water only goes where you slope it. The standard is a quarter inch of fall per foot, running to the drain. On a curbless shower we almost always use a linear drain, a long narrow drain set against a wall or right at the entry. A linear drain lets us slope the whole floor in one direction, on a single plane, instead of pitching it four ways down to a small center drain. Single-plane slope is easier to build correctly, easier to tile, and easier to stand and walk on. We either set a pre-sloped pan made for a linear drain or pack and screed a mortar bed by hand to that slope.
The membrane is what actually keeps water out
Here is the part people get wrong: tile and grout are not waterproof. Grout is cement, and water passes right through it. What keeps water out of your floor and walls is the waterproofing membrane under the tile, and that membrane is the real shower. We build ours as a bonded system, which means the waterproofing is adhered directly to the substrate with no gap behind it for water to track through. Depending on the job, that is a sheet membrane, a foam board system, or a liquid membrane rolled on in coats. (Brand names you may have run into are Kerdi, Wedi, and Hydro Ban. They are different products that do the same job.)
Then we seal every weak point, because a membrane is only as good as its seams. We band the seams and inside corners with preformed pieces, seal around the drain flange, and carry the waterproofing up the walls well above the shower head. For a curbless shower we add one step that matters more than people expect: we run the membrane out past the opening, onto the bathroom floor outside the shower. Water is going to travel out the open side. We want it landing on waterproofing, not on bare subfloor.
The flood test, where shortcuts get caught
Before a single tile goes down, we plug the drain, fill the pan with water, mark the level, and leave it for 24 hours. The next day we check two things: whether the water level dropped, and whether anything is damp in the framing below. If it holds, we tile. If it dropped, we find the leak right then, while it is a small fix, instead of two years from now when it is a full demo.
This is the step that gets skipped on rushed jobs, and skipping it is the single most common reason a shower leaks. It costs us a day. It saves you a rebuild. We do it on every pan, no exceptions.
Tile goes on last, and only after the test passes
Once the waterproofing passes, the tile is the finish, not the waterproofing. We set it over the membrane, match the tile slope to the pan so water still runs to the drain, keep the grout joints tight, and seal natural stone if that is what you chose. If you are still deciding on tile, we wrote a separate guide on choosing the right tile that is worth reading first. Just keep the order straight: the tile is the part you see, the membrane underneath is the part keeping you dry.
Why this matters even more here
We are in the Pacific Northwest. Showers get used hard, bathrooms stay humid, and nothing dries out quickly. When water gets past a bad pan in this climate, it does not evaporate, it sits in the subfloor and the framing. The whole reason waterproofing exists is moisture control, and as the EPA puts it, the key to mold control is moisture control. Give a hidden leak a couple of wet seasons and it turns into rot, mold, and a repair that runs many times what the shower cost. That is the call we get most often on other people’s work: not a cracked tile, a soaked floor under it.
Why we don’t subcontract the pan
The pan and the waterproofing are exactly where corners get cut when a builder hands the job to whoever is cheapest and fastest that week. We do not subcontract this part. The same crew frames the recess, builds the pan, waterproofs it, runs the flood test, and sets the tile, so one set of hands is accountable for whether your shower holds. That is the only way the flood test means anything, because the people who would be tempted to skip it are the same people who have to stand behind it later.
Planning a curbless shower in your Covington home?
We build curbless and low-curb walk-in showers across Covington and the rest of our service area, and we do the waterproofing the slow, boring, correct way every time. If you want one built so you are not thinking about it in two years, we are glad to come look at your bathroom and give you a real number. You can see more of what we do on our Covington remodeling page, or call us at (206) 773-8264.
Written by Vasile Teterea, owner of Firm Remodeling LLC. Licensed Washington contractor, registration FIRMRRL783PU, remodeling bathrooms, kitchens, and basements across King County for over a decade.
Curbless shower waterproofing questions we get a lot
Why do curbless showers leak?
Almost always the pan or the waterproofing under the tile, not the tile itself. Curbless raises the stakes because there is no curb holding water in, so the slope, the drain, and the membrane all have to be right, and the membrane has to extend past the opening. We flood test every pan before tiling to catch a problem while it is still a small fix.
Do you need a linear drain for a curbless shower?
It is not strictly required, but we usually use one. A linear drain lets us slope the whole floor in one direction instead of pitching it four ways to a center drain, which is easier to build right and more comfortable to stand on. A center drain can work, it is just harder to get flat and flush.
Can any bathroom be made curbless?
Most can, but it depends on the floor. On a wood-framed floor we recess the subfloor so the sloped pan finishes flush at the doorway, which means checking the joists first. On a concrete slab it is usually simpler. We look at the framing before we quote it, so there are no surprises mid-project.
How do you test a shower for leaks before tiling?
We plug the drain, fill the pan with water, mark the level, and leave it 24 hours. If the level holds and nothing is damp in the framing below, it passes and we tile. If it drops, we find and fix the leak before any tile goes on.
